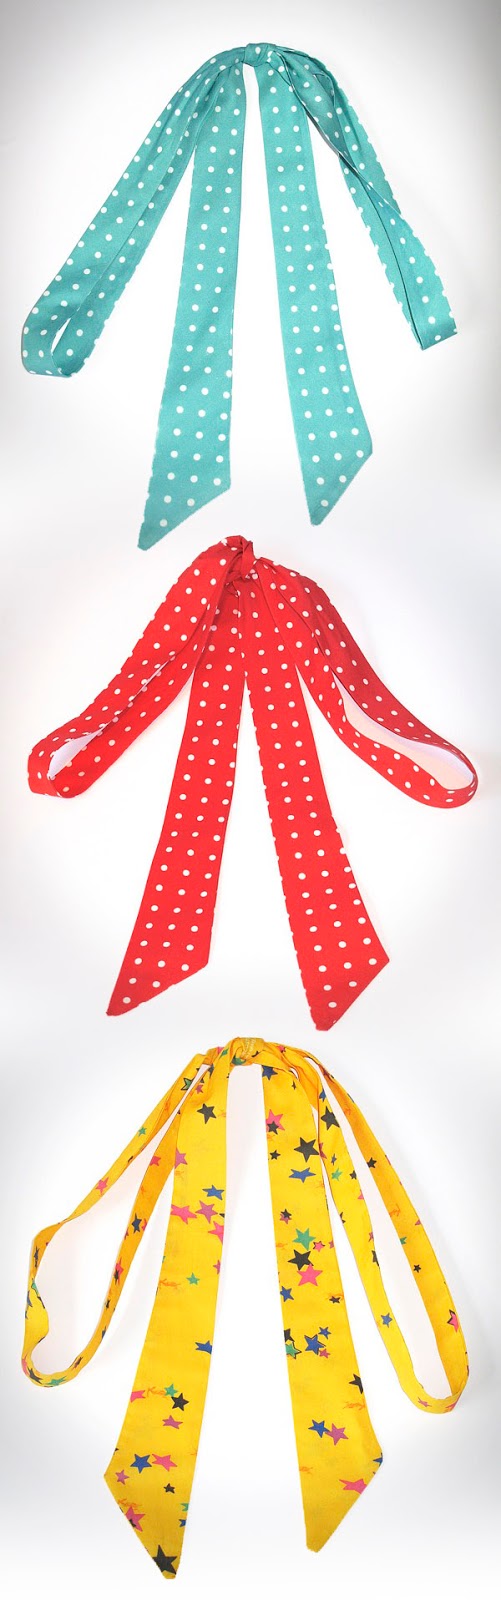
 The pattern repeat for the stars is far less distinct or identifiable, so I took high resolution scans of the entire length of both sides of the cravat, with overlaps to make sure I got everything (see right).
As a test, I patched the images for one side together in Photoshop and found there was a distinct curve to the cravat which had been caused by one of the long edges being hemmed and the other just folded. This gives a different tension which results in the curve (see below).


I soon had the eighteen scans patchworked together to create a single image file of the entire cravat (see below).
Although I had taken high resolution scans, the image quality was still far from perfect. The cravat was a little crumpled in places, and as I will reveal later, has some embroidery on it, which although I plan to recreate it, is not coming through as clearly as it could do.
As well as having a screen-used original, my friends also showed me a previously made replica which had been produced directly from scanned images, just like the ones I have taken. Sadly I felt it had lost a lot of detail and sharpness in the process with the edges of the stars had become quit blurred and their points rounded, as well as the colours being somewhat off.
Scanning fabric never gives a pin-sharp image, and then reprinting it onto new fabric always then looses some further detail.


As I had done with the polka-dot design, I traced the outer shape of the cravat and generated a seam allowance and splicing point as the original (see left) before exporting it to Photoshop ready for uploading to Spoonflower.
There is one last thing I need to do before it is ready.
The star design fabric is a much lighter, more silk material than the polka-dot cravats, and has a surprising origin. I had heard on the grapevine that it was a Yves Saint-Lauren fabric, but was understandably skeptical and wondered how this was known for sure.

So to make my replica as good as I possibly can, I assessed each logo on the scans I had and found the clearest.
I then retouched it to isolate the embroidery (see left).

My last thing to do is add my clothing label, which on this occasion I am printing directly onto the cravat. To blend it in and have a bit of fun, I colour change parts of it to match the colours used elsewhere in the cravat (see below).

I now have finished usable artwork (see below).
 This cravat, unlike the polka-dot version, is not cut on the bias, so it became an easy job to set up the imposed artwork file horizontally rather than diagonally as before (see left).
This is then uploaded to Spoonflower and I am ready to place a test order so I can make some prototypes and see how it comes out (see below).

It’s just a waiting game now til the fabric arrives . . .


Awesome!
ReplyDeleteOnce again, amazingly interesting to see you recreate these things in photoshop.
Very jealous.
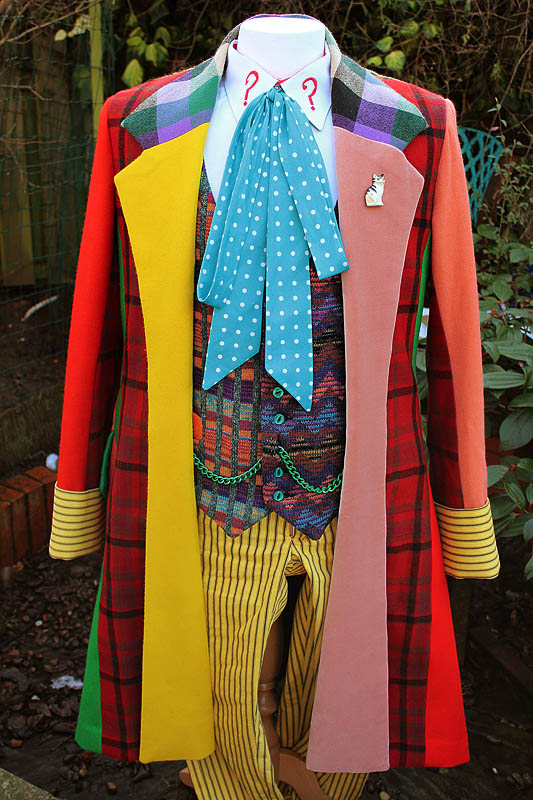
Canʻt wait to see more of your 5th Doctor coat and test burgundy tennant suit!