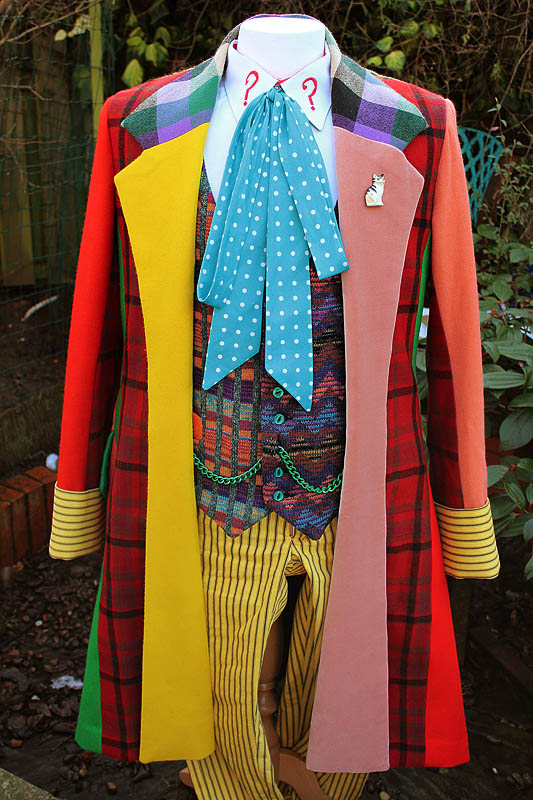
Right Pocket Section

So - the day has arrived when I can actually start making my Ultimate Six Frock Coat. It’s been a while coming, but it feel good to be there at last.

The first thing I need to do is cut all the pieces required for this section, which uses the Red Felt (fabric 5), Peach Wool (fabric 4), Green Felt (fabric 3) and Pink Felt (fabric 11), as well as the Checked Collar (fabric 6), Lining (fabric 14) and Green Braid (fabric 12) to make the pocket flap.
I’ve had to carefully mark up my pattern so I cut all the right pieces in the correct colours. It would be a disaster to waste fabric by cutting the wrong pieces in the wrong colours!
First thing I needed to make was the pocket flap. I had to wait until now because it is made of the collar fabric which I had to get hand woven, lined with the extraordinary lining fabric which also was a custom weave.

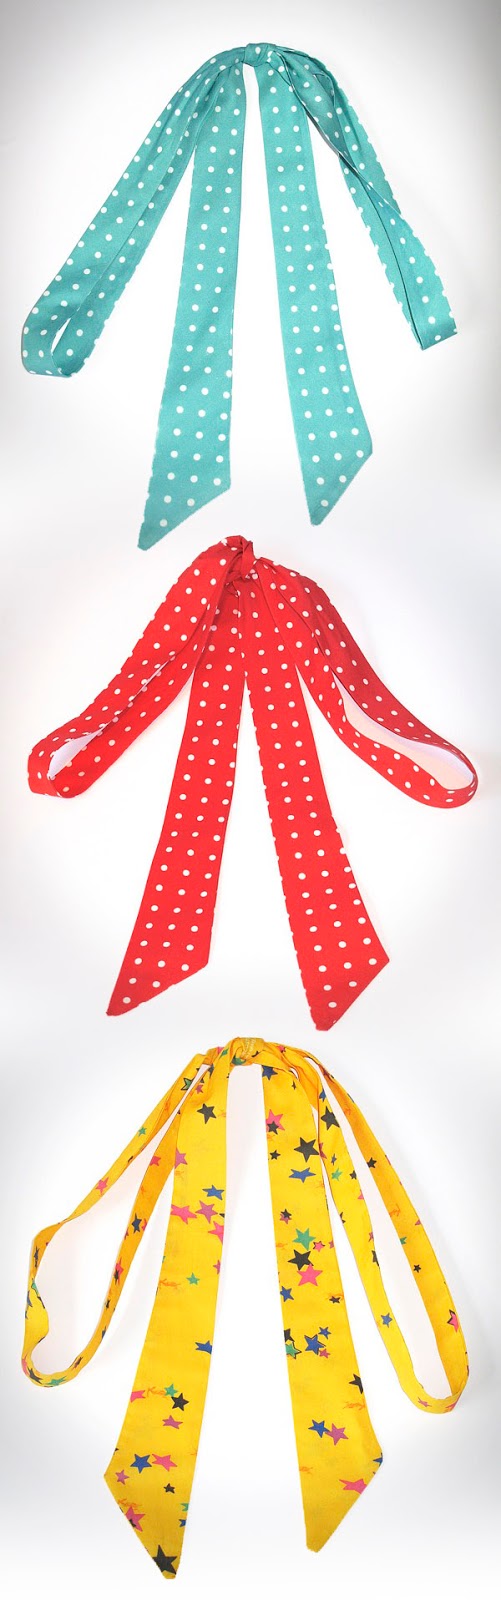
This photo shows the cut pieces just laid together - nothing is sewn yet - but you can see how I have matched the pattern on the pocket flap as close as possible.
 Once the flap was made, and I had piped the edge using my Green Braid, I can then go about making the pocket. The flap get sewn to the panel above the pocket and the pocket bag gets sewn below.
There’s a bit of a secret about the outer pockets that for now I’m keeping under wraps, but suffice to say it's fun making the pockets as accurately as I can.
 Once the pocket panel is completed I can then build up the rest of the section around it, attaching the narrow green panel to the front edge; the green under arm panel; as well as the adjacent column of peach and red.
Laying it out on my bench and seeing it done gives me a real buzz. I’m excited to see the first productive section coming together so well and looking just the way I wanted it.

I'll move on now to the left hand pocket section and do what I can there.
Check back soon to see the results.


Does all that basting on the large peach panel under the pocket flap have anything to do with the secret about the pocket construction?
ReplyDeleteHa ha ha - strangely not at all!
Delete